
 Bulk actions allow you to perform multiple operations on several students simultaneously, saving time and ensuring consistency across your student management tasks.
Before You Begin
Ensure you are logged in to T360 using your staff member account.
Make sure your User Role permits you to perform bulk actions.
Step-by-Step Guide
1. Navigate to "Students" > "List" in T360.
2. At the top of the student list, locate the "Mass Update" section.
3. Before applying mass updates, filter students using available criteria such as First Name, Last Name, or Regular Schedule to narrow down your selection.
4. Once the desired students are filtered, select them for the bulk action:
Select All – selects every student in your current list, regardless of list size.
Select Visible List – selects only the students visible on the current page of the list.
(Example: selecting the visible list will only choose students shown on that page.)
4.1. To display checkboxes next to student names, ensure the filters are applied.

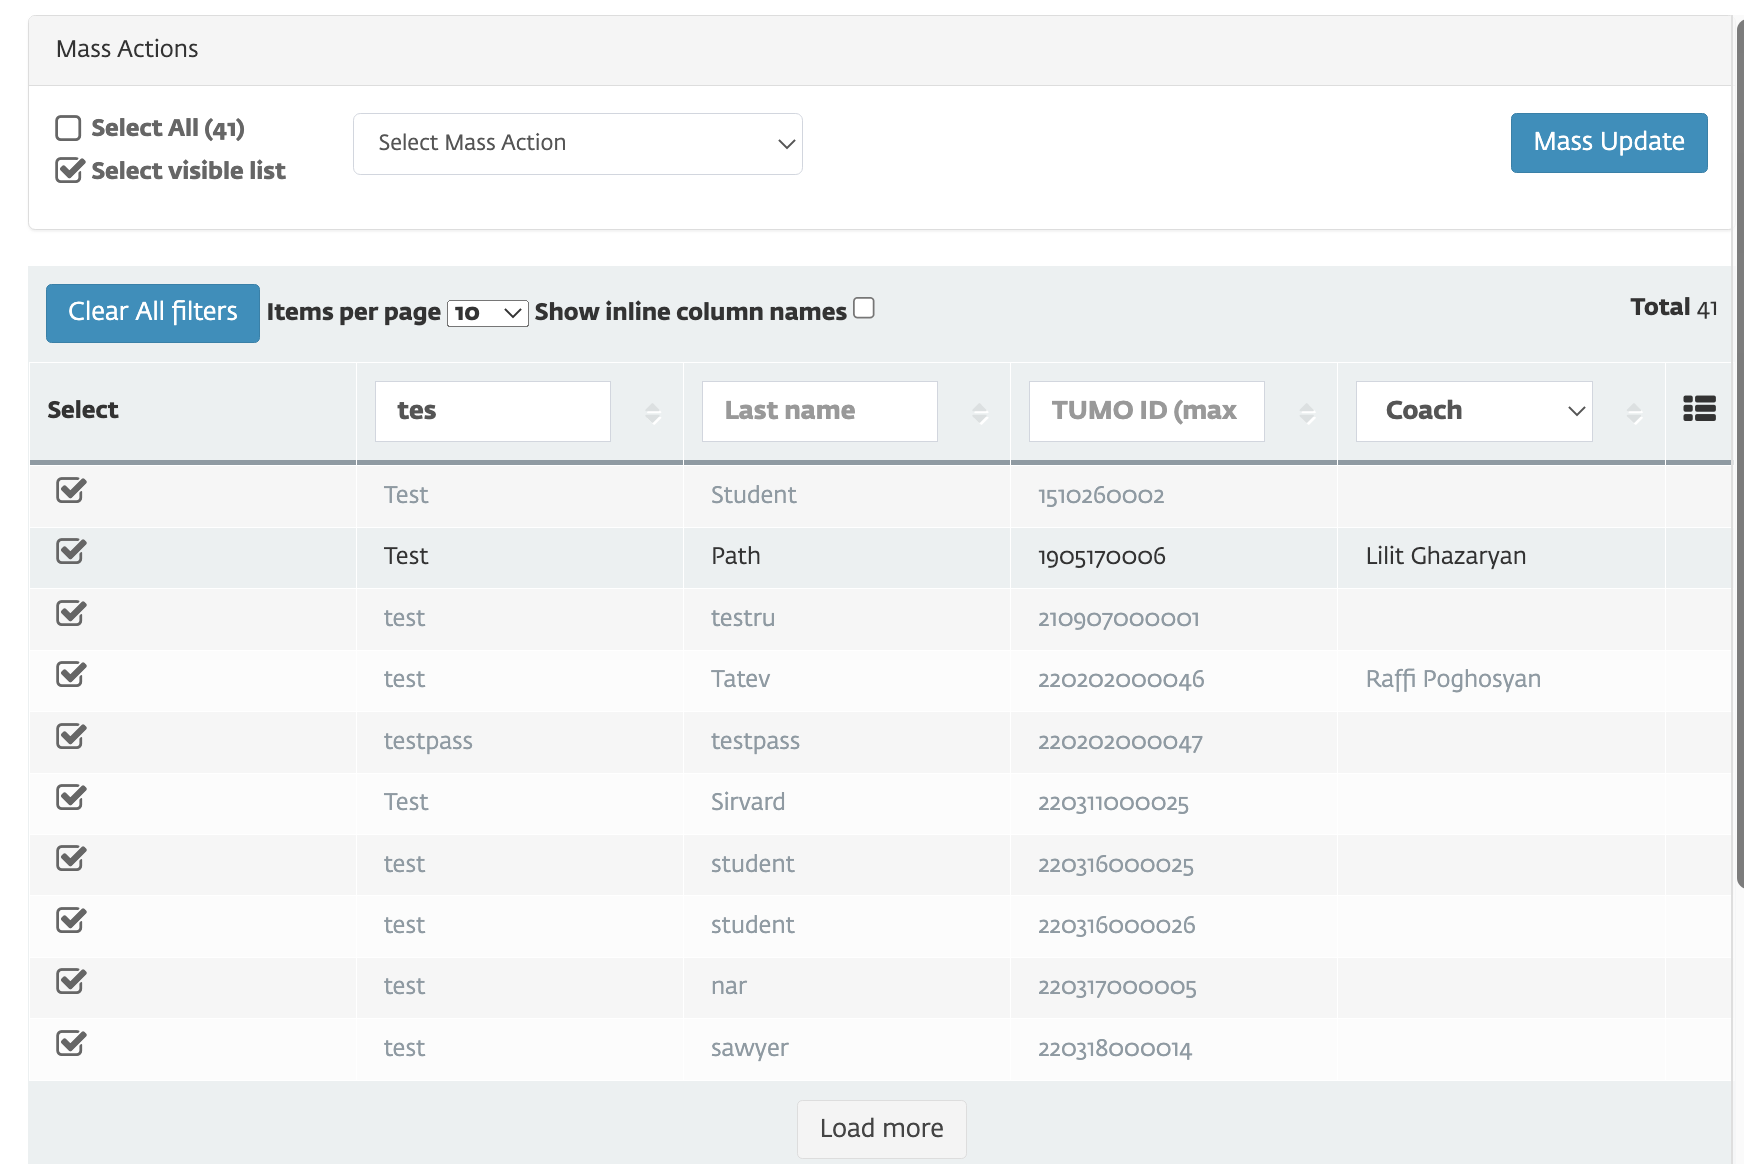
(In this screenshot, I selected the visible list and it only chose the 10 students in the list.)
4.1. To be able to see the checkboxes next to the students' names then apply it from the filters.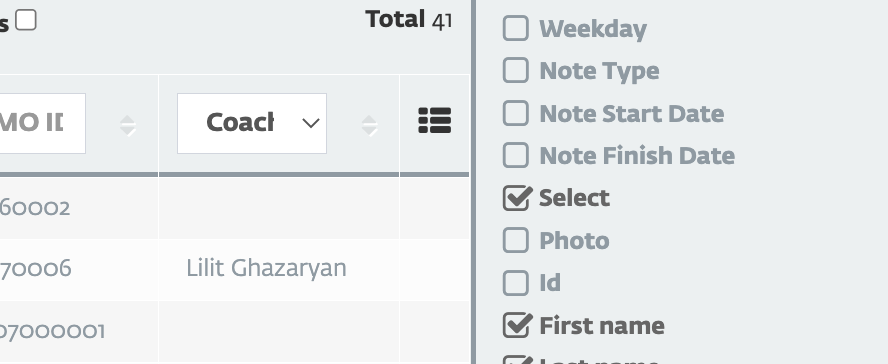
5. Now that you have your list, it is time for you to choose the action. Press on the "Select Mass Action" dropdown button and choose one of these actions.
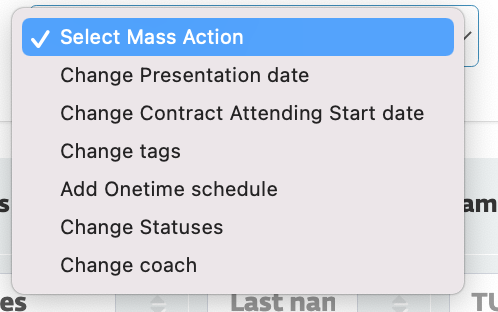
Change Presentation Date
Updates the presentation date for the selected students. When this action is chosen, you will need to enter the new presentation date, which will then be applied to the students.Change Contract Attending Start Date
Prompts you to enter a new start date for the contracts of the selected students. This action updates the original start date of their contracts.Change Tags
Allows you to either add or remove tags for the selected students.Add One-Time Schedule
Assigns a one-time schedule to the selected students. You will be prompted to enter the date and time for the schedule.Change Statuses
Enables you to change the Status of the selected students to a new, specified status.Change Coach
Provides two options: assign a new coach to the selected students or remove the current coach.- Excuse Absence – mark excused absences for selected students in bulk.
Once you have configured the desired action(s), click the Mass Update button to apply the changes.
Video tutorial
In the following video, we will try choosing all active students who have regular schedules as Tuesday 17:30-19:00 and assigning them a onetime schedule for November 30th, Saturday 17:30-19:00.
Handling Most Common Issues
No frequent issues have been detected with this workflow. If You detect a problem, please apply to TUMO Product support.